Prerequisites
Before creating a workflow, ensure you have:- A connected Web3 wallet such as MetaMask
- Kwala credits in your account
- Deployed smart contracts if your workflow monitors contract events or executes contract functions
Create a new workflow
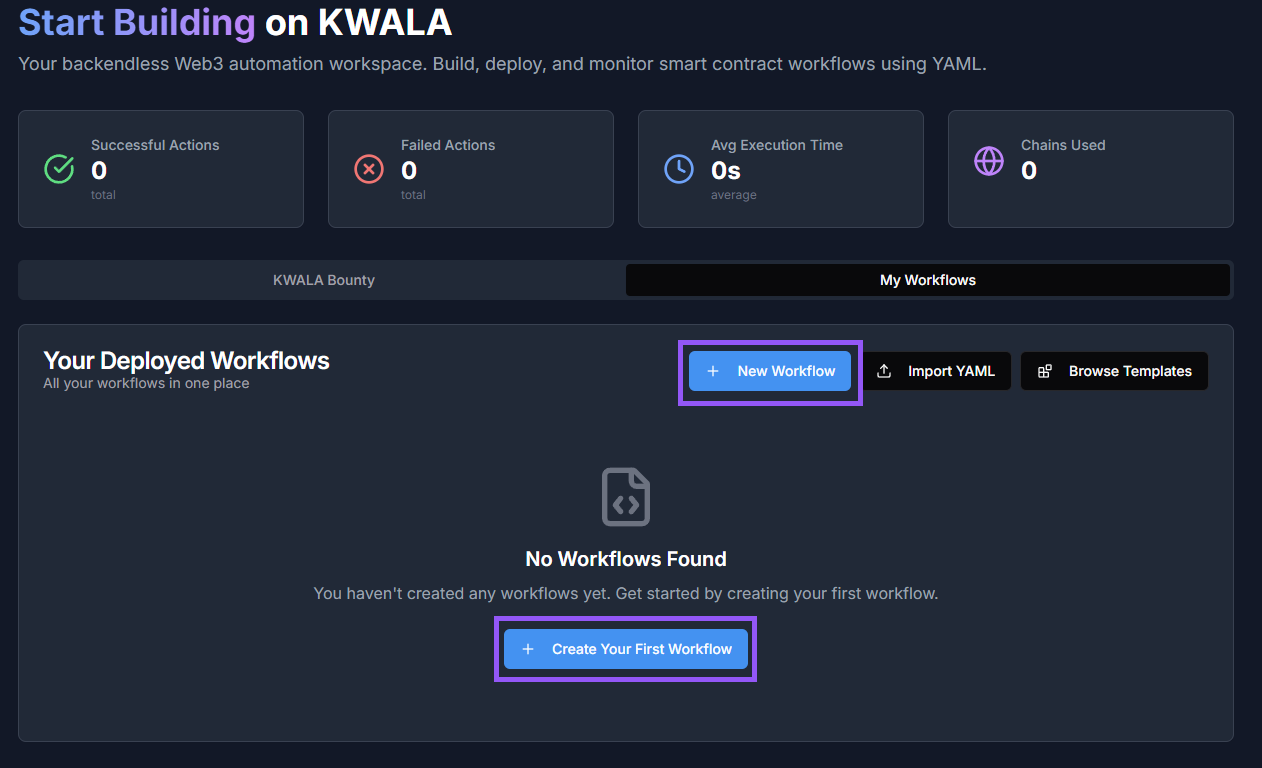
Open the Kwala dashboard
Navigate to the Kwala dashboard and sign in with your connected wallet.
Open the Workflow builder
You’ll be redirected to the Workflow Editor. Select Workflow Builder in the top right of the navigation menu to open the visual builder.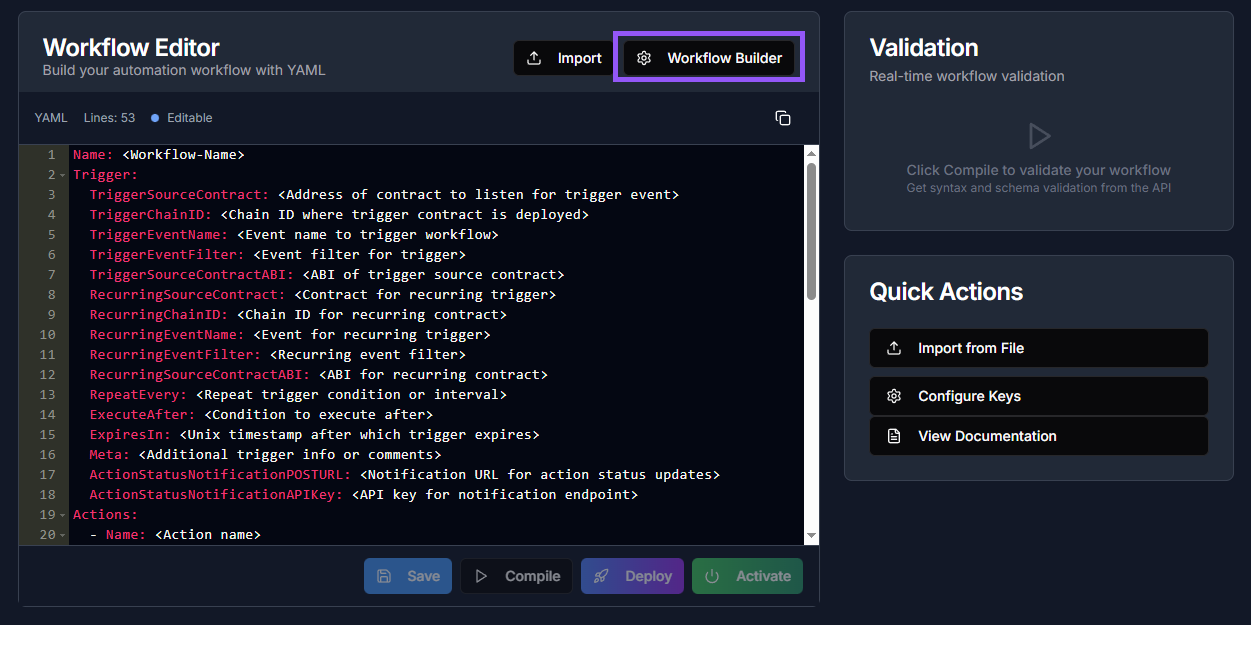
Enter workflow information
Start by providing basic information about your workflow: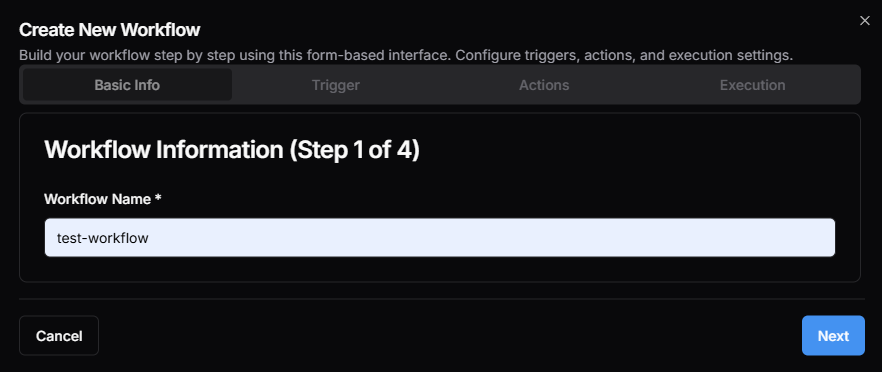
- Workflow name: Enter a descriptive name that identifies your workflow’s purpose
Configure triggers and actions
Next, configure your workflow’s triggers and actions: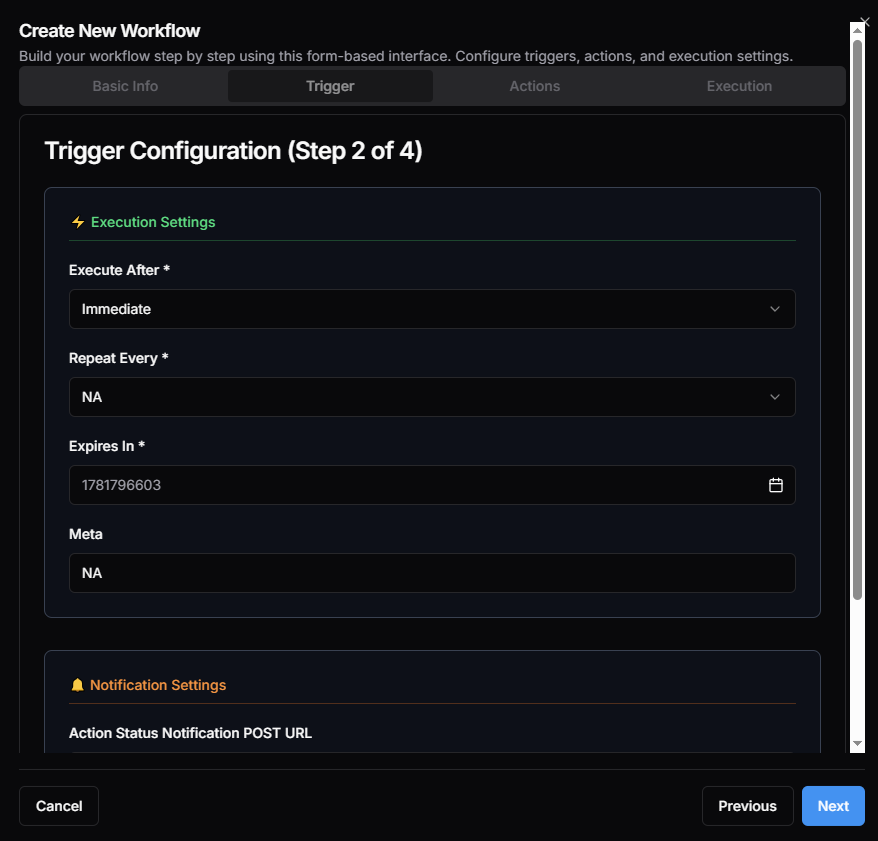
- Triggers: Define when your workflow should activate.
- Actions: Specify what your workflow should do when triggered (up to 10 actions)
- Execution mode: Choose sequential or parallel execution
Next steps
Configure workflow
Set up triggers, actions, and execution mode
Workflow templates
Start with pre-built templates